

 23 hours ago
11
23 hours ago
11
PROTECT YOURSELF with Orgo-Life® QUANTUM TECHNOLOGY
Orgo-Life the new way to the future Advertising by Adpathway
With countless nights out in all kinds of tents, Neil has refined the shelter he uses for bikepacking trips. In his latest review, he explores the complexities of a tent he says is unlike any other. Find his Yama Mountain Gear 1P Swiftline review below…
If you’ve followed my journey with bikepacking shelters, you know it has evolved. As with bikes, testing shelters can feel like getting a peek inside the maker’s brain. Some move toward more conventional, almost corporate designs, while others get creative and distinct. The Yama Mountain Gear Swiftline 1P tent is more the latter and offers a very different take on what a shelter can look like. Check out my full video review below, followed by a written version.
Yama Mountain Gear Background
When I reached out to Gen Shimizu of Yama Mountain Gear earlier this year, I told him I was looking for a shelter I could use across all seasons. He was stoked to send one over, but what I heard next blew me away. Looking to return to the Tour Divide for 2027, he revealed he’d already ridden the route in 2012. As if the 2,000+ mile route down the entire country wasn’t hard enough, Gen had done so on a unicycle. I was in awe. Turns out, that trip was a pivotal moment for both Gen and Yama Mountain Gear.
To start from the beginning, Gen founded Yama Mountain Gear in 2006 after conversations he had while hiking the Pacific Crest Trail. Those experiences—along with the many trips that followed—continue to help shape the products he designs and ultimately brings to market. Gen told me that his time unicycling the Divide in 2012 served as a period of reflection. He debated whether, or even if, he wanted to continue with the business. Ultimately, that pushed him toward making Yama Mountain Gear a full-time focus instead of just a side project, and he hasn’t looked back since.
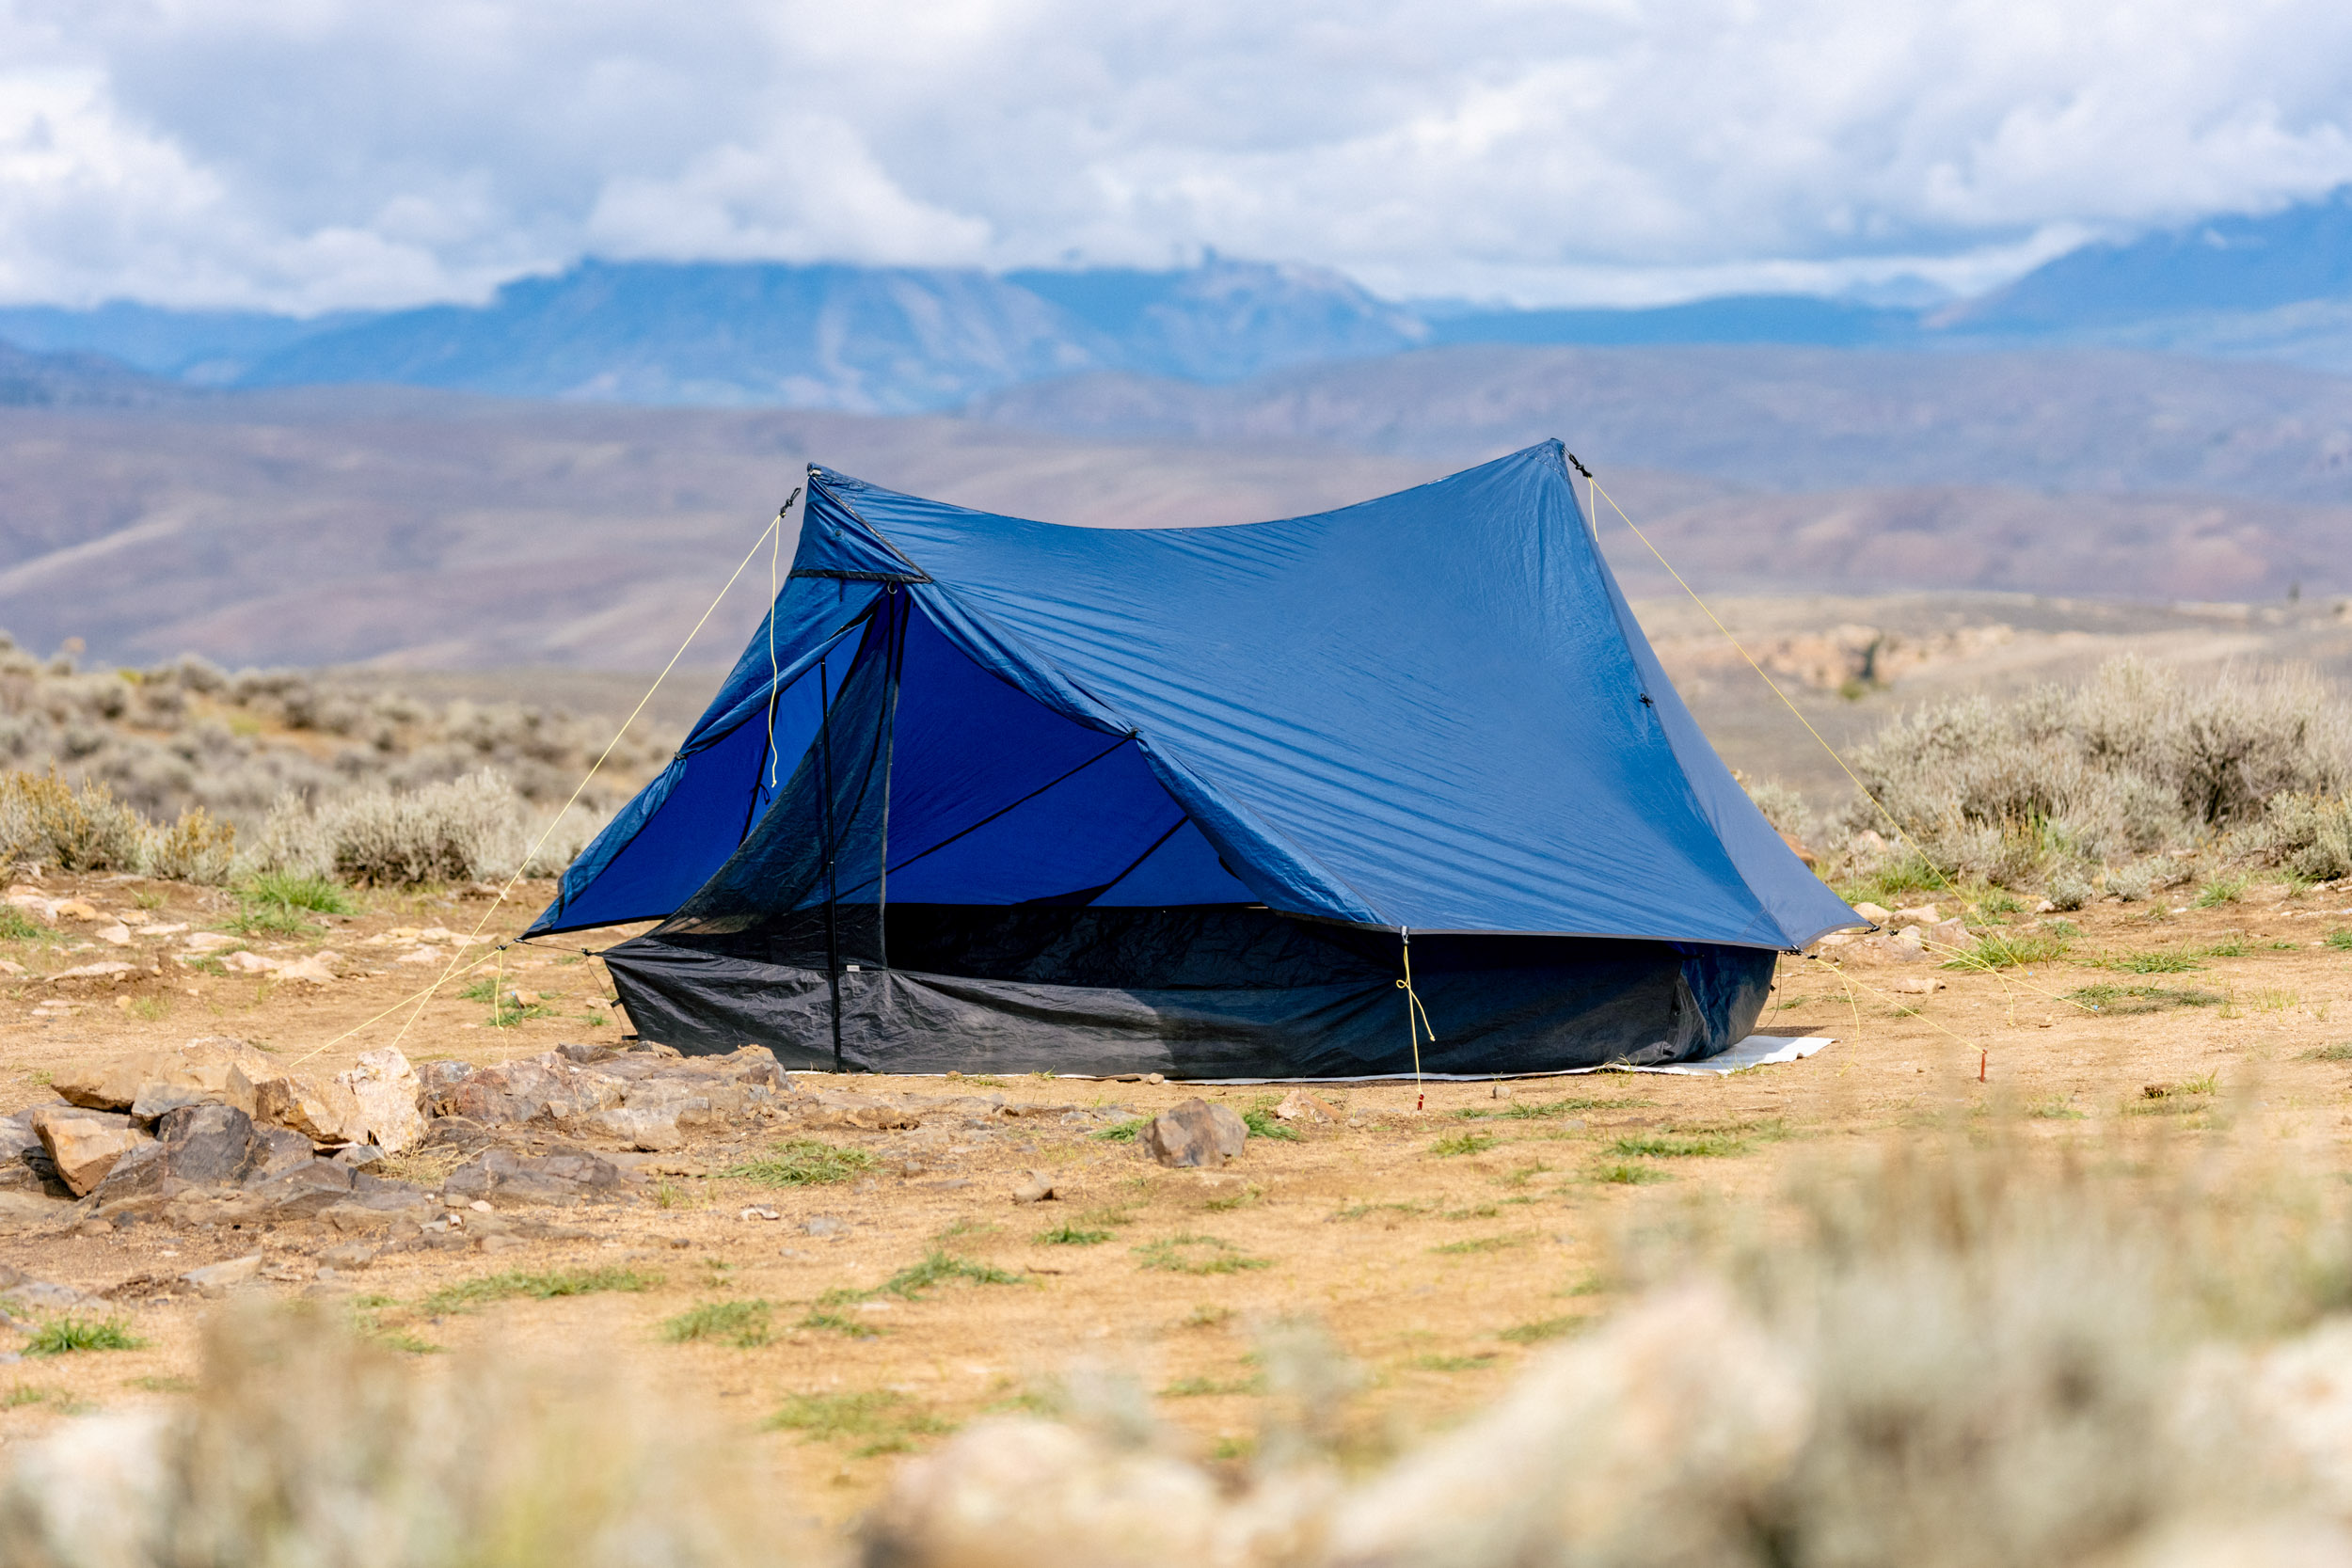
Yama Mountain Gear makes a few different shelter styles, but its catalog doesn’t stop there. The brand also makes backpacks, loads of pack accessories, and a variety of other hiking and outdoor gear. Fittingly, yama means “mountain” in Japanese. The Yama Mountain Gear Swiftline 1P got a whole lot of use in the mountains of Colorado this summer, so let’s dive into the specs, design, and my overall thoughts after spending a bunch of time with it.
The Swiftline 1P Tent Specs
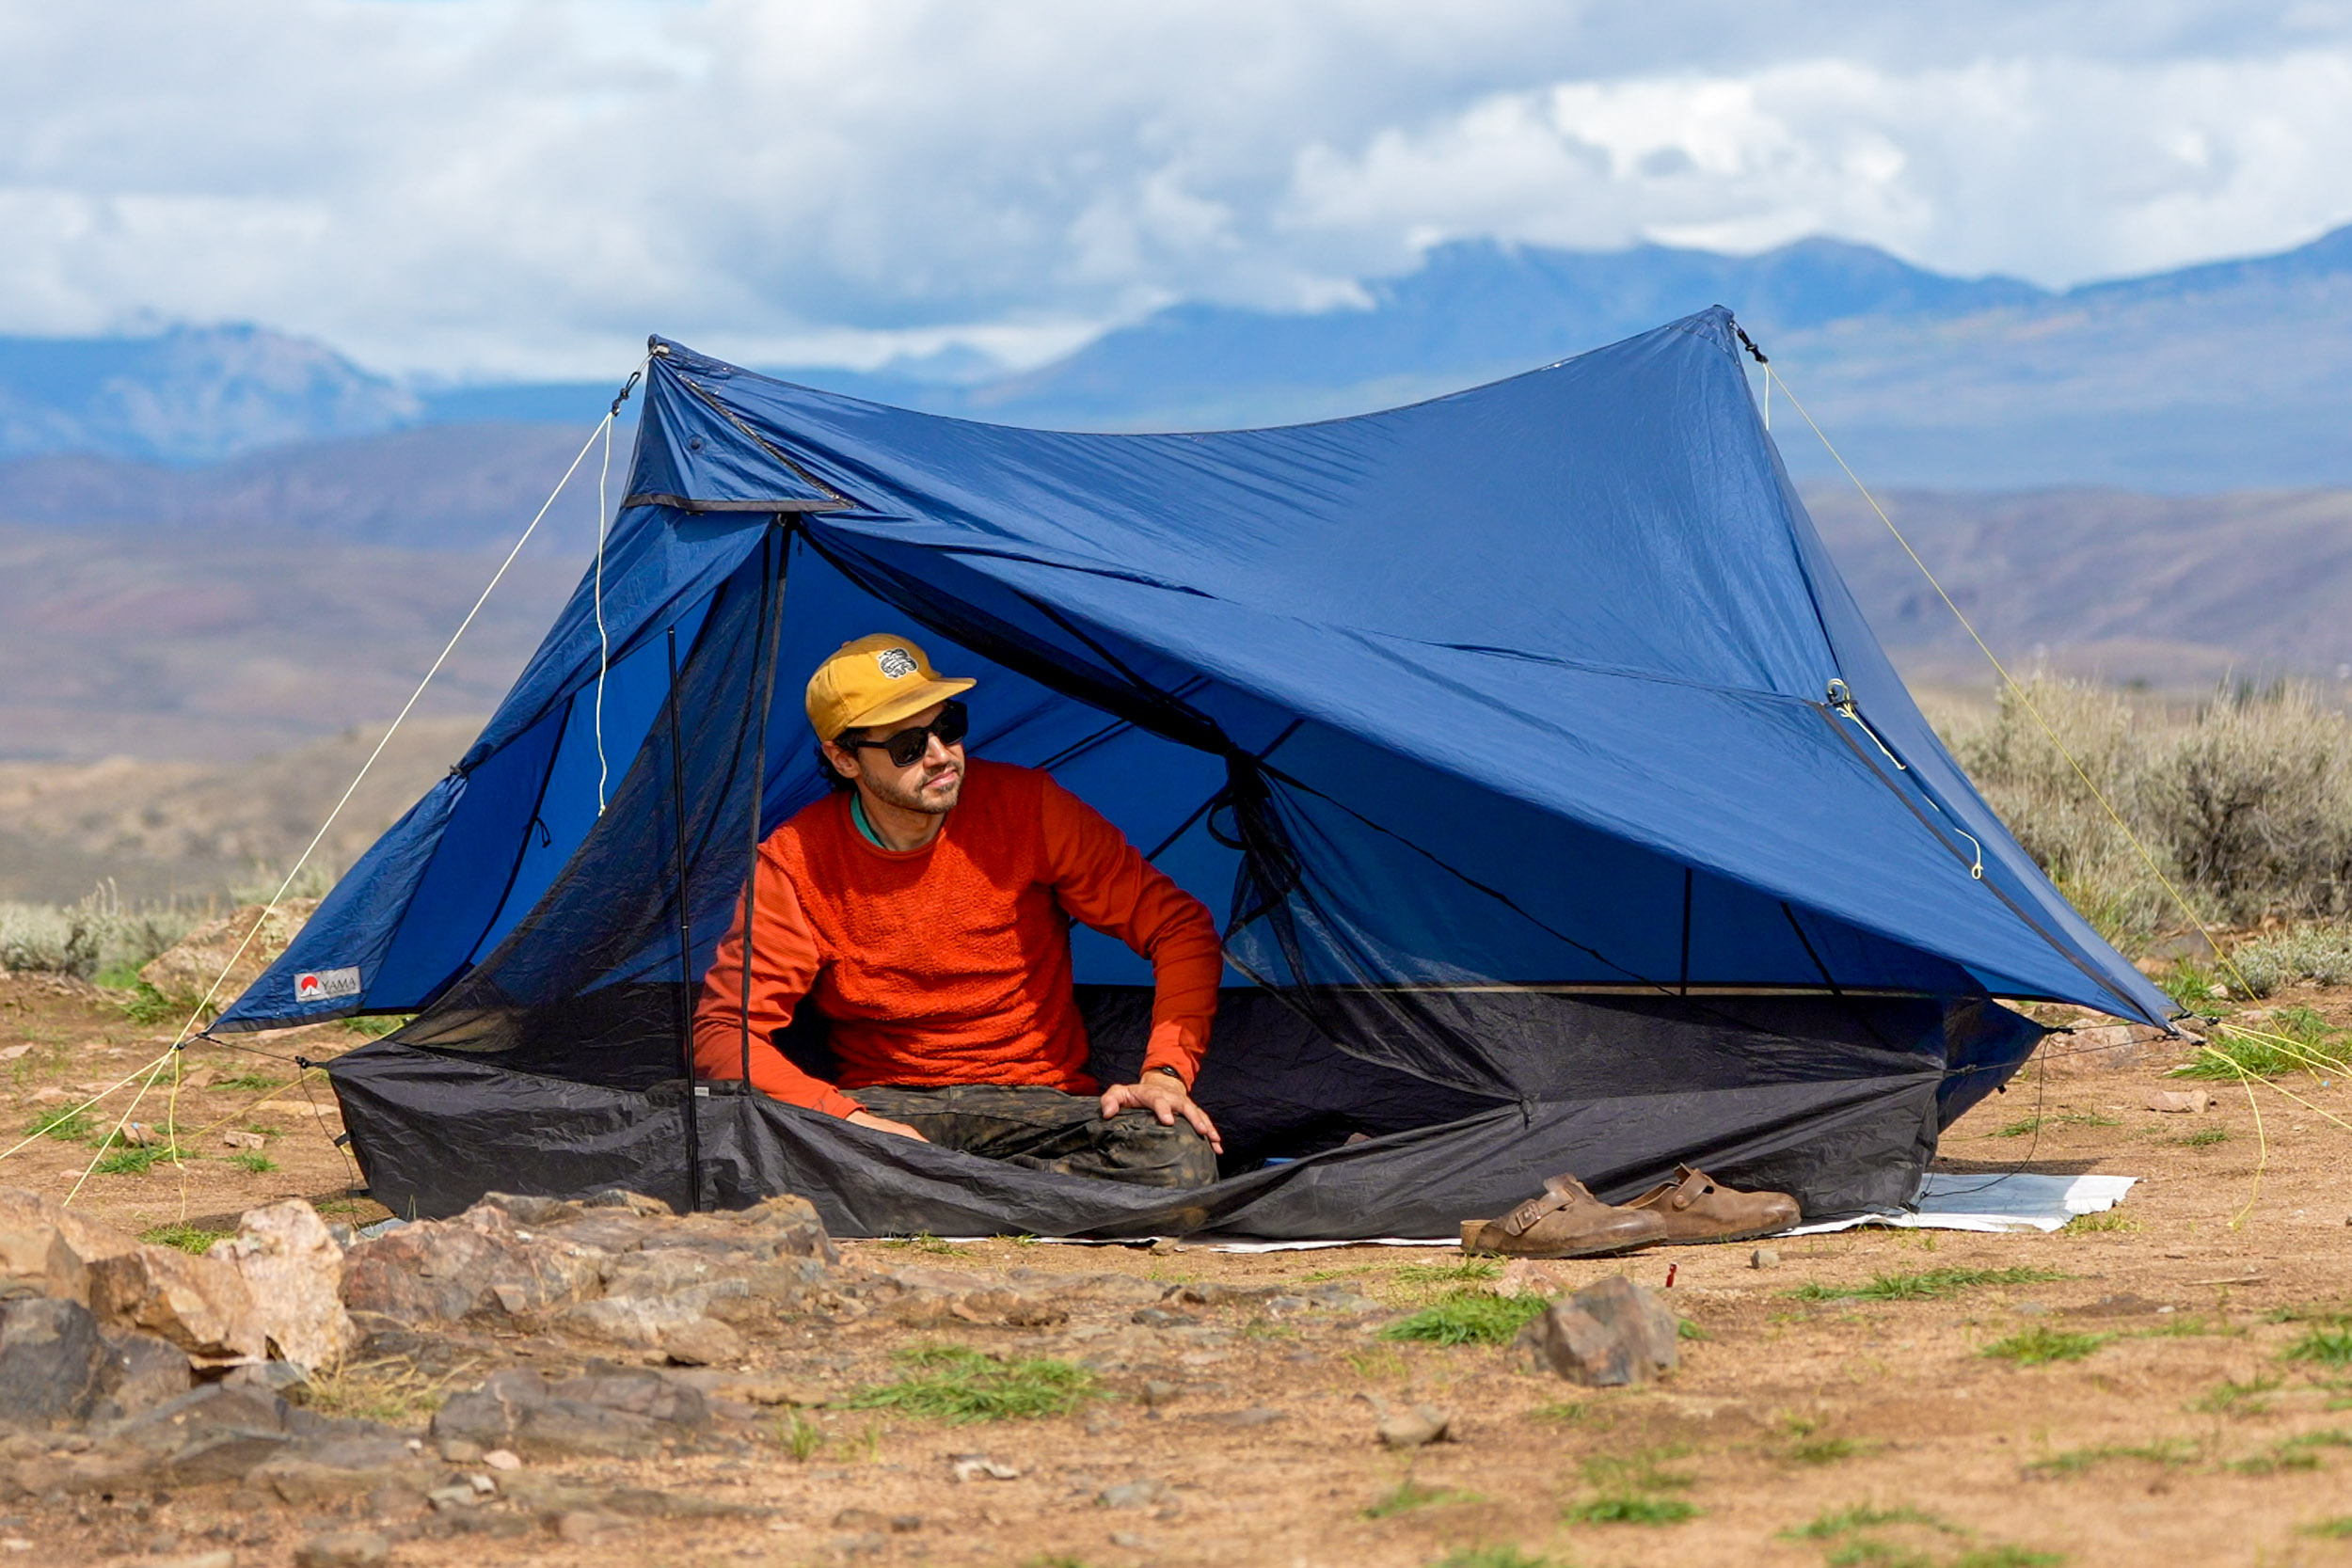
When I say the Swiftline is a different take on a shelter, I mean it’s unlike any shelter I’ve tested. Other shelters have similar ideas; Miles tested the Durston X-Mid, for example, but this layout felt fresh to me. Two offset poles support the fly near opposite ends, while eight stake-out points help create a sturdy, livable shelter with a single entry.
The Swiftline 1P comes in three inner lengths: short, medium, and long. Each is available in a standard or light configuration. The short is 203cm long, the medium is 218cm, and the long is 233cm. All three have a floor width of about 76cm. I tested the medium, which Yama recommends for people roughly 170 to 188cm tall; I’m 176.5cm, for reference. Sizes overlap, so if you fall in between, you can size up or down depending on your preferences. Yama has a helpful graphic on its website showing how usable interior space changes with your height. Maximum headroom in the medium and long is about 112cm, and the short is roughly 2.5cm lower. From there, the roof slopes toward the ends.
The choice between standard and light comes down to the inner shelter; both use the same shelter design and rainfly. The standard, which I tested, has a 20-denier silpoly floor with a hydrostatic head of roughly 4,000mm, plus slightly heavier mesh that’s less prone to snagging. Yama recommends it for most people. For those curious about the hydrostatic head, it’s a lab test of how much water pressure a fabric can resist before water starts to pass through it. A 2,000mm rating means the fabric can hold back the pressure of a two-meter column of water; 4,000mm means it can withstand twice that pressure. For a shelter floor, the higher rating gives you more protection when your weight presses the fabric against wet ground, though both ratings can work well in a properly pitched shelter.

The light version uses a recycled 20-denier silpoly floor with a hydrostatic head of roughly 2,000mm and lighter mesh. Depending on the size, it saves about 60-70 grams. In Medium, the claimed packaged weight is 790 grams for the standard and 721 grams for the light. You can also buy just the fly and pair it with a groundsheet—Tyvek, for example—for a simpler setup if bugs are not an issue.
Speaking of the rainfly, this part of the shelter doesn’t change size and fits all three inner sizes. It’s made from recycled 20d silpoly, which absorbs less water and stretches less when wet than sil-nylon. That said, the rainfly doesn’t come with taped seams; this is an add-on, but they’ll do it for you for $60, or you can do it yourself if you prefer. The fly has guy-out points and cord near the base and up near the two axis points of the shelter, each with a tensioner and a loop for staking it down and tightening or loosening each section. Stakes aren’t included, though Yama sells several options on their website.
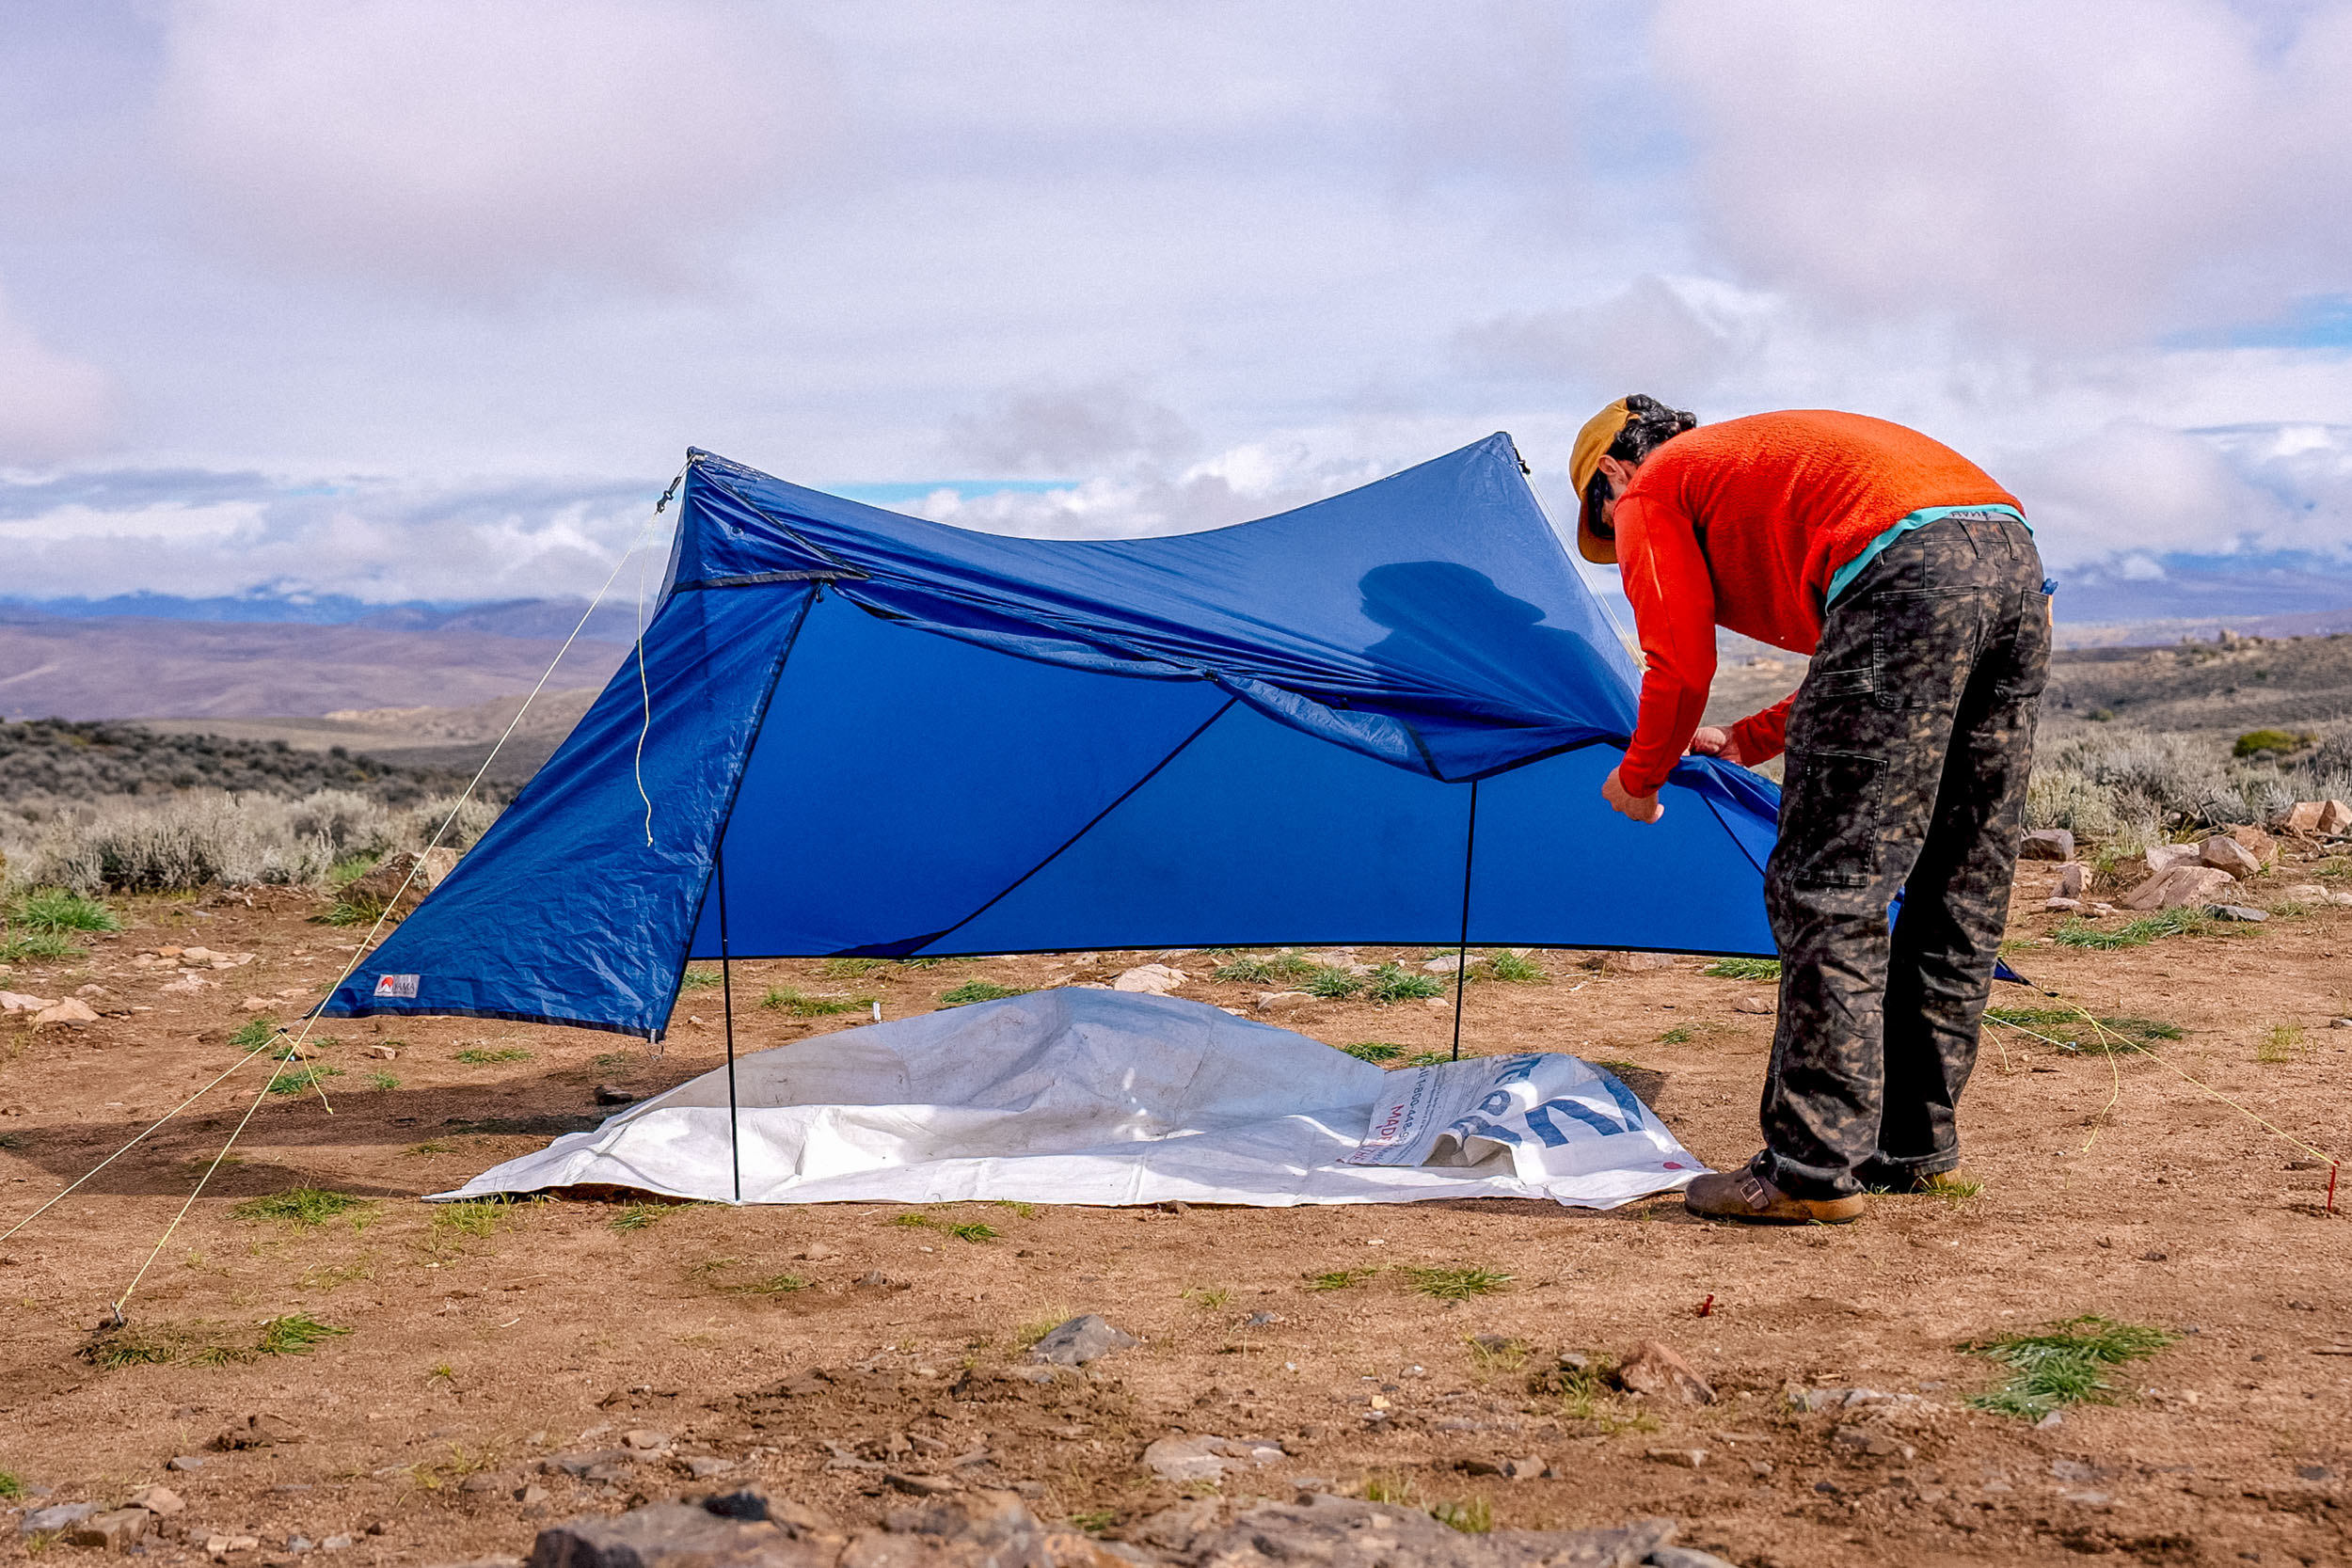
Finally, the Swiftline was designed around trekking poles, but Yama also offers an aluminum option. Gen sent me both aluminum and prototype carbon poles to try. I used the carbon ones mostly because they packed shorter: the pair weighs 113 grams, and each four-section pole collapses to nearly 34cm. Those carbon poles aren’t currently an option Yama can reliably source, but Gen is still looking into shorter pole sections and carbon options for bikepackers. The aluminum pole pair sold on Yama’s website weighs 149 grams, and each pole collapses to 44cm. That may still be longer than some bikepackers want, but the pole set is fairly simple and less bulky than many I’ve used. Gen did mention his goal is to find a pole set that collapses to 33cm, or just over a foot.
Setup
To help users get set up, Yama has a helpful video on its website. The Swiftline needs to be guyed out properly for a taut pitch, but after a few tries, I found it pretty easy and intuitive. A bonus tip I found useful: you can leave the inner attached to the fly, which is how I kept mine throughout the test period and saves you plenty of time. Start by staking out the fly’s four main corners. At this point, it should look roughly like a rectangle. Then slide the poles underneath. Backpackers can use trekking poles; I used the carbon poles Gen sent me. They aren’t as stiff as trekking poles, but they held up well during a big storm and in the wind.
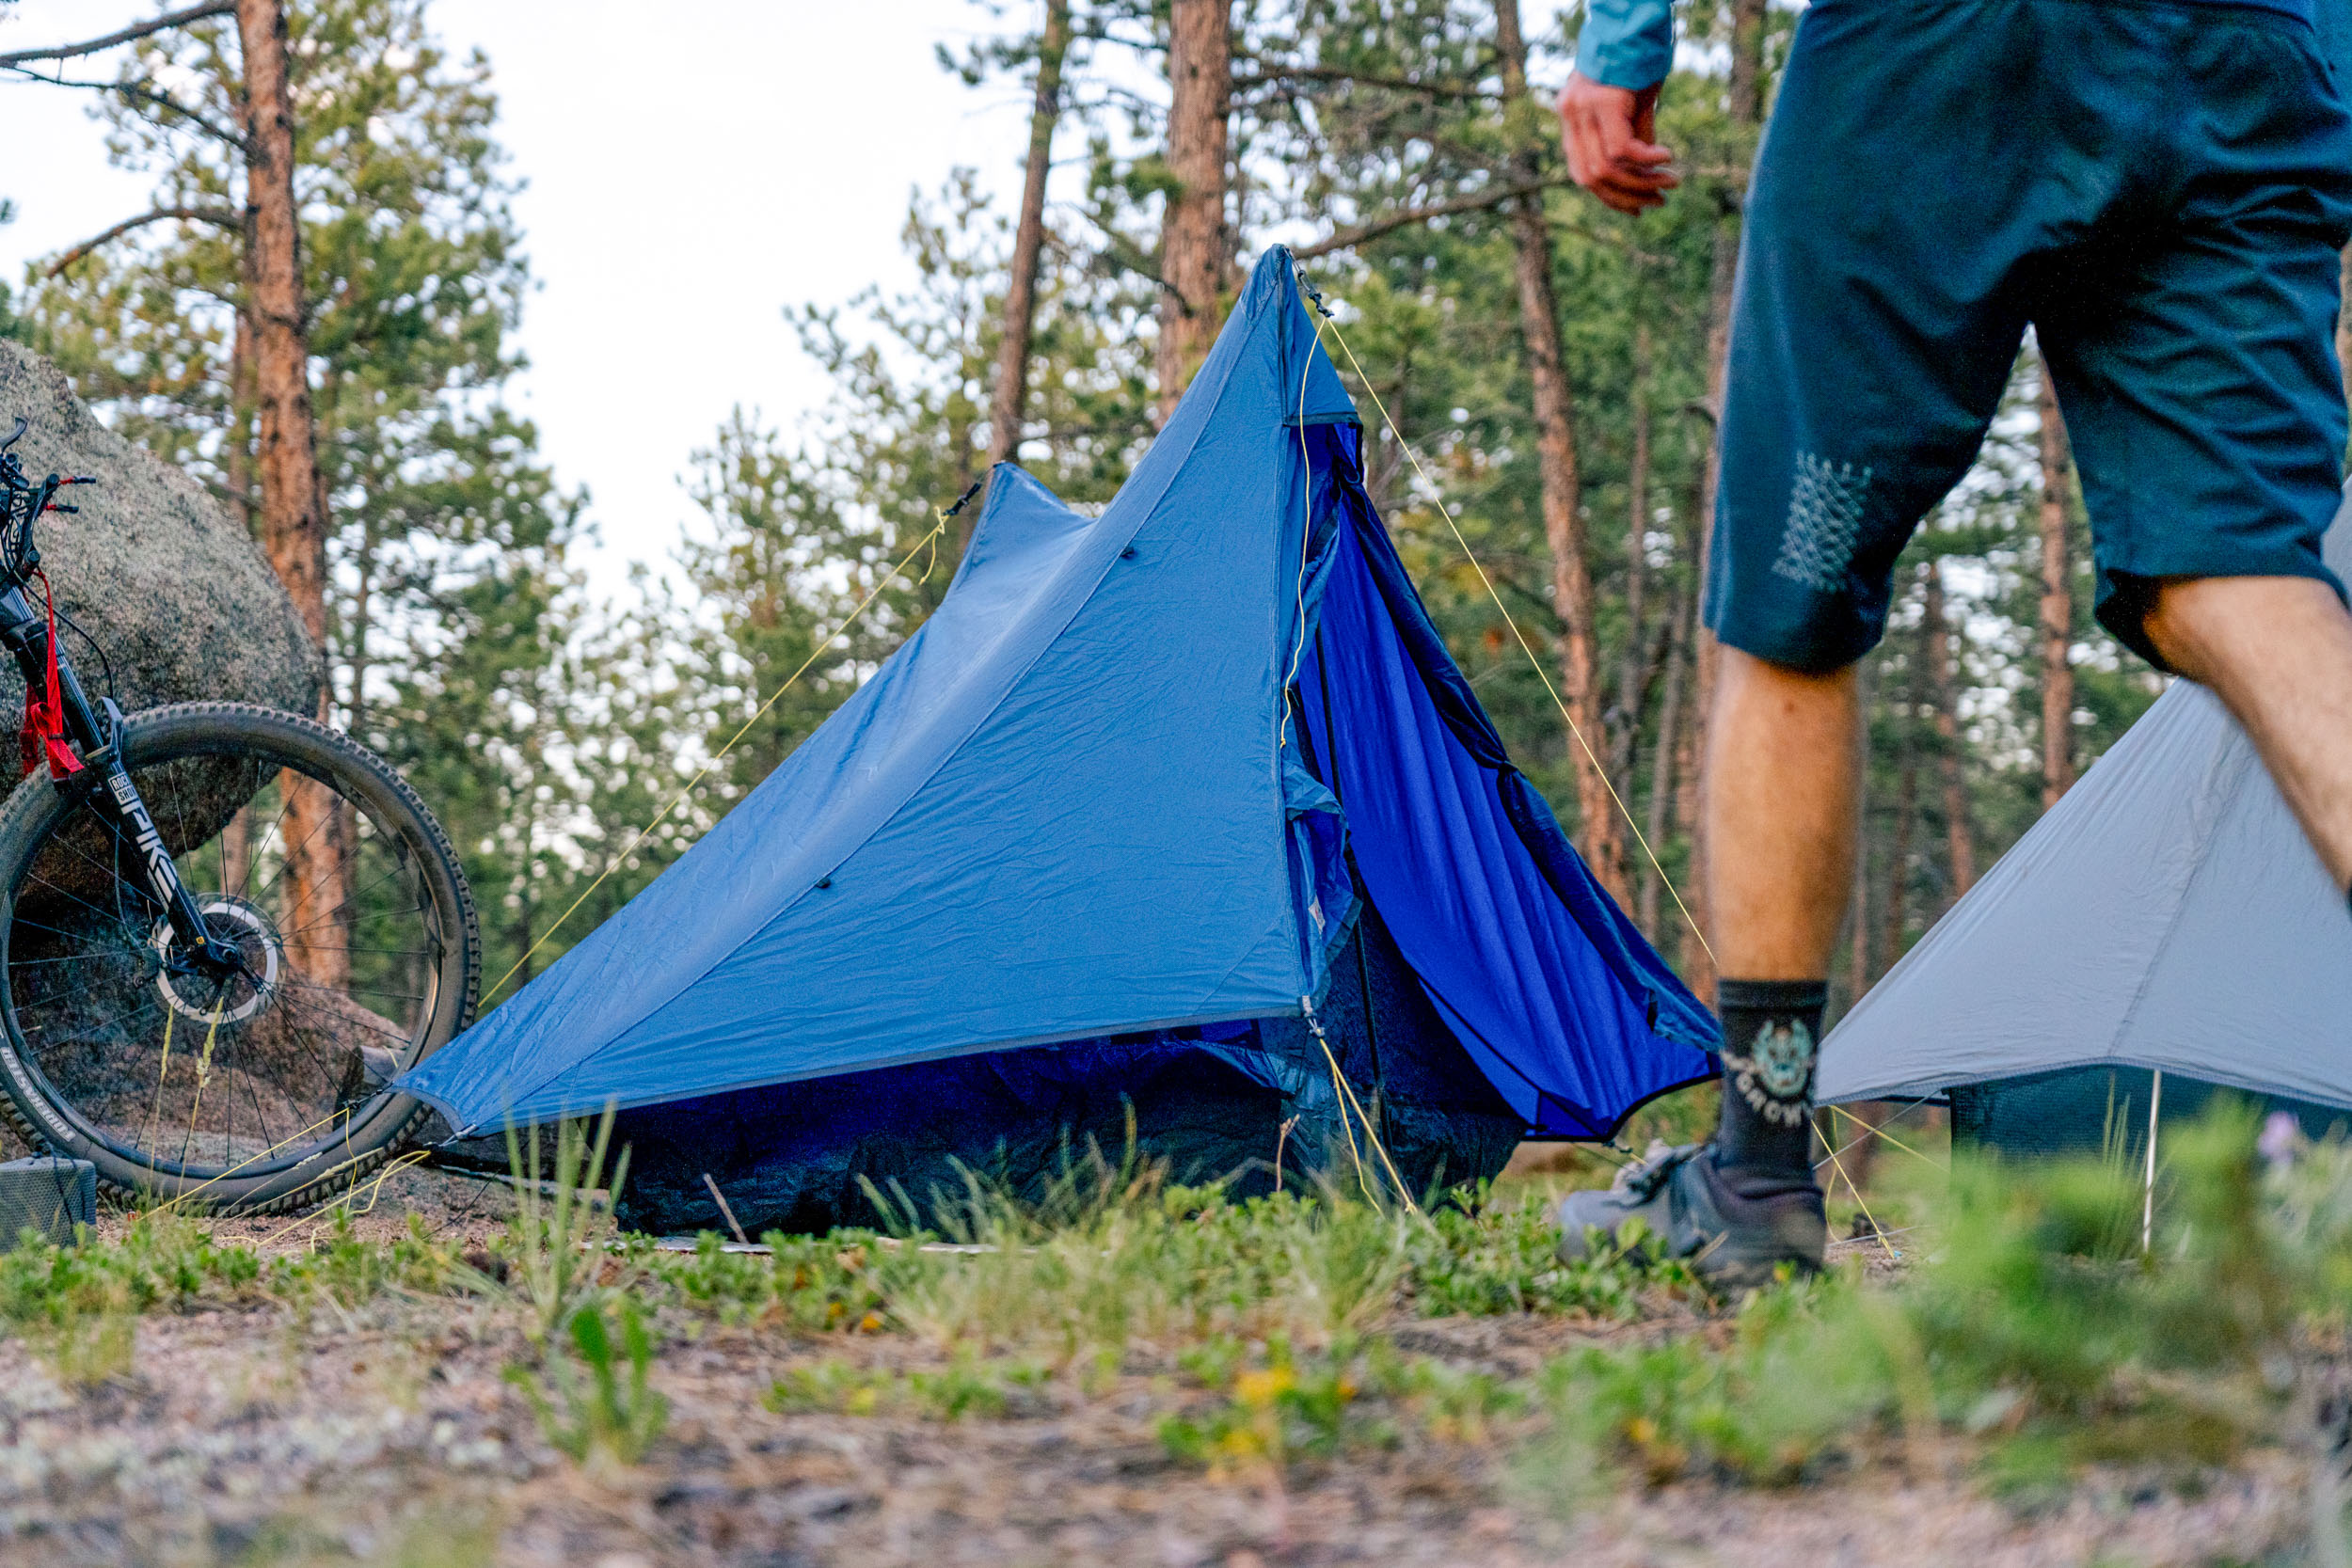
Each pole sits in a grommet at the bottom and another at the apex of the fly; it’s hard to mess this up. With the poles in place, stake out the two apex guylines, angling them slightly toward their respective ends of the shelter. Then stake out the two remaining points to pull out the vestibules and give the shelter its shape. Gen says you can share stakes between the apex guylines and the nearby side points, bringing the total from eight stakes down to six. I tried that, but I preferred using all eight points for a more even, stable setup.
Once everything is staked down, adjust the guylines until the fly looks balanced. This was the hardest part at first: I sometimes had to loosen one corner and tighten another to get an even pitch without bending the poles too much. It’s best not to overtighten the four corners right away, but make them tight enough.
If you’re attaching the inner for the first time, clip its two upper points to the apexes inside the fly, then attach the four corners of the bathtub floor to the fly. You can also run the bathtub’s bungees through the loops along its sides and around the stakes to pull the walls up a bit more. I rarely bothered with that extra step. Attaching the inner to the upper loops gave me plenty of space inside. For ventilation, two vents are near the top of the fly. I usually propped them open, and I think they helped reduce condensation, but you can snap them shut to enclose the shelter completely. My favorite feature, though, is how far you can open the fly. You can roll each side of the door back to the first seam and tie it off, or roll both sides back farther for more airflow. Waking up after a cold night and opening the shelter to some sunlight feels great. If rain moves in or the temperature drops, you can close it up quickly.
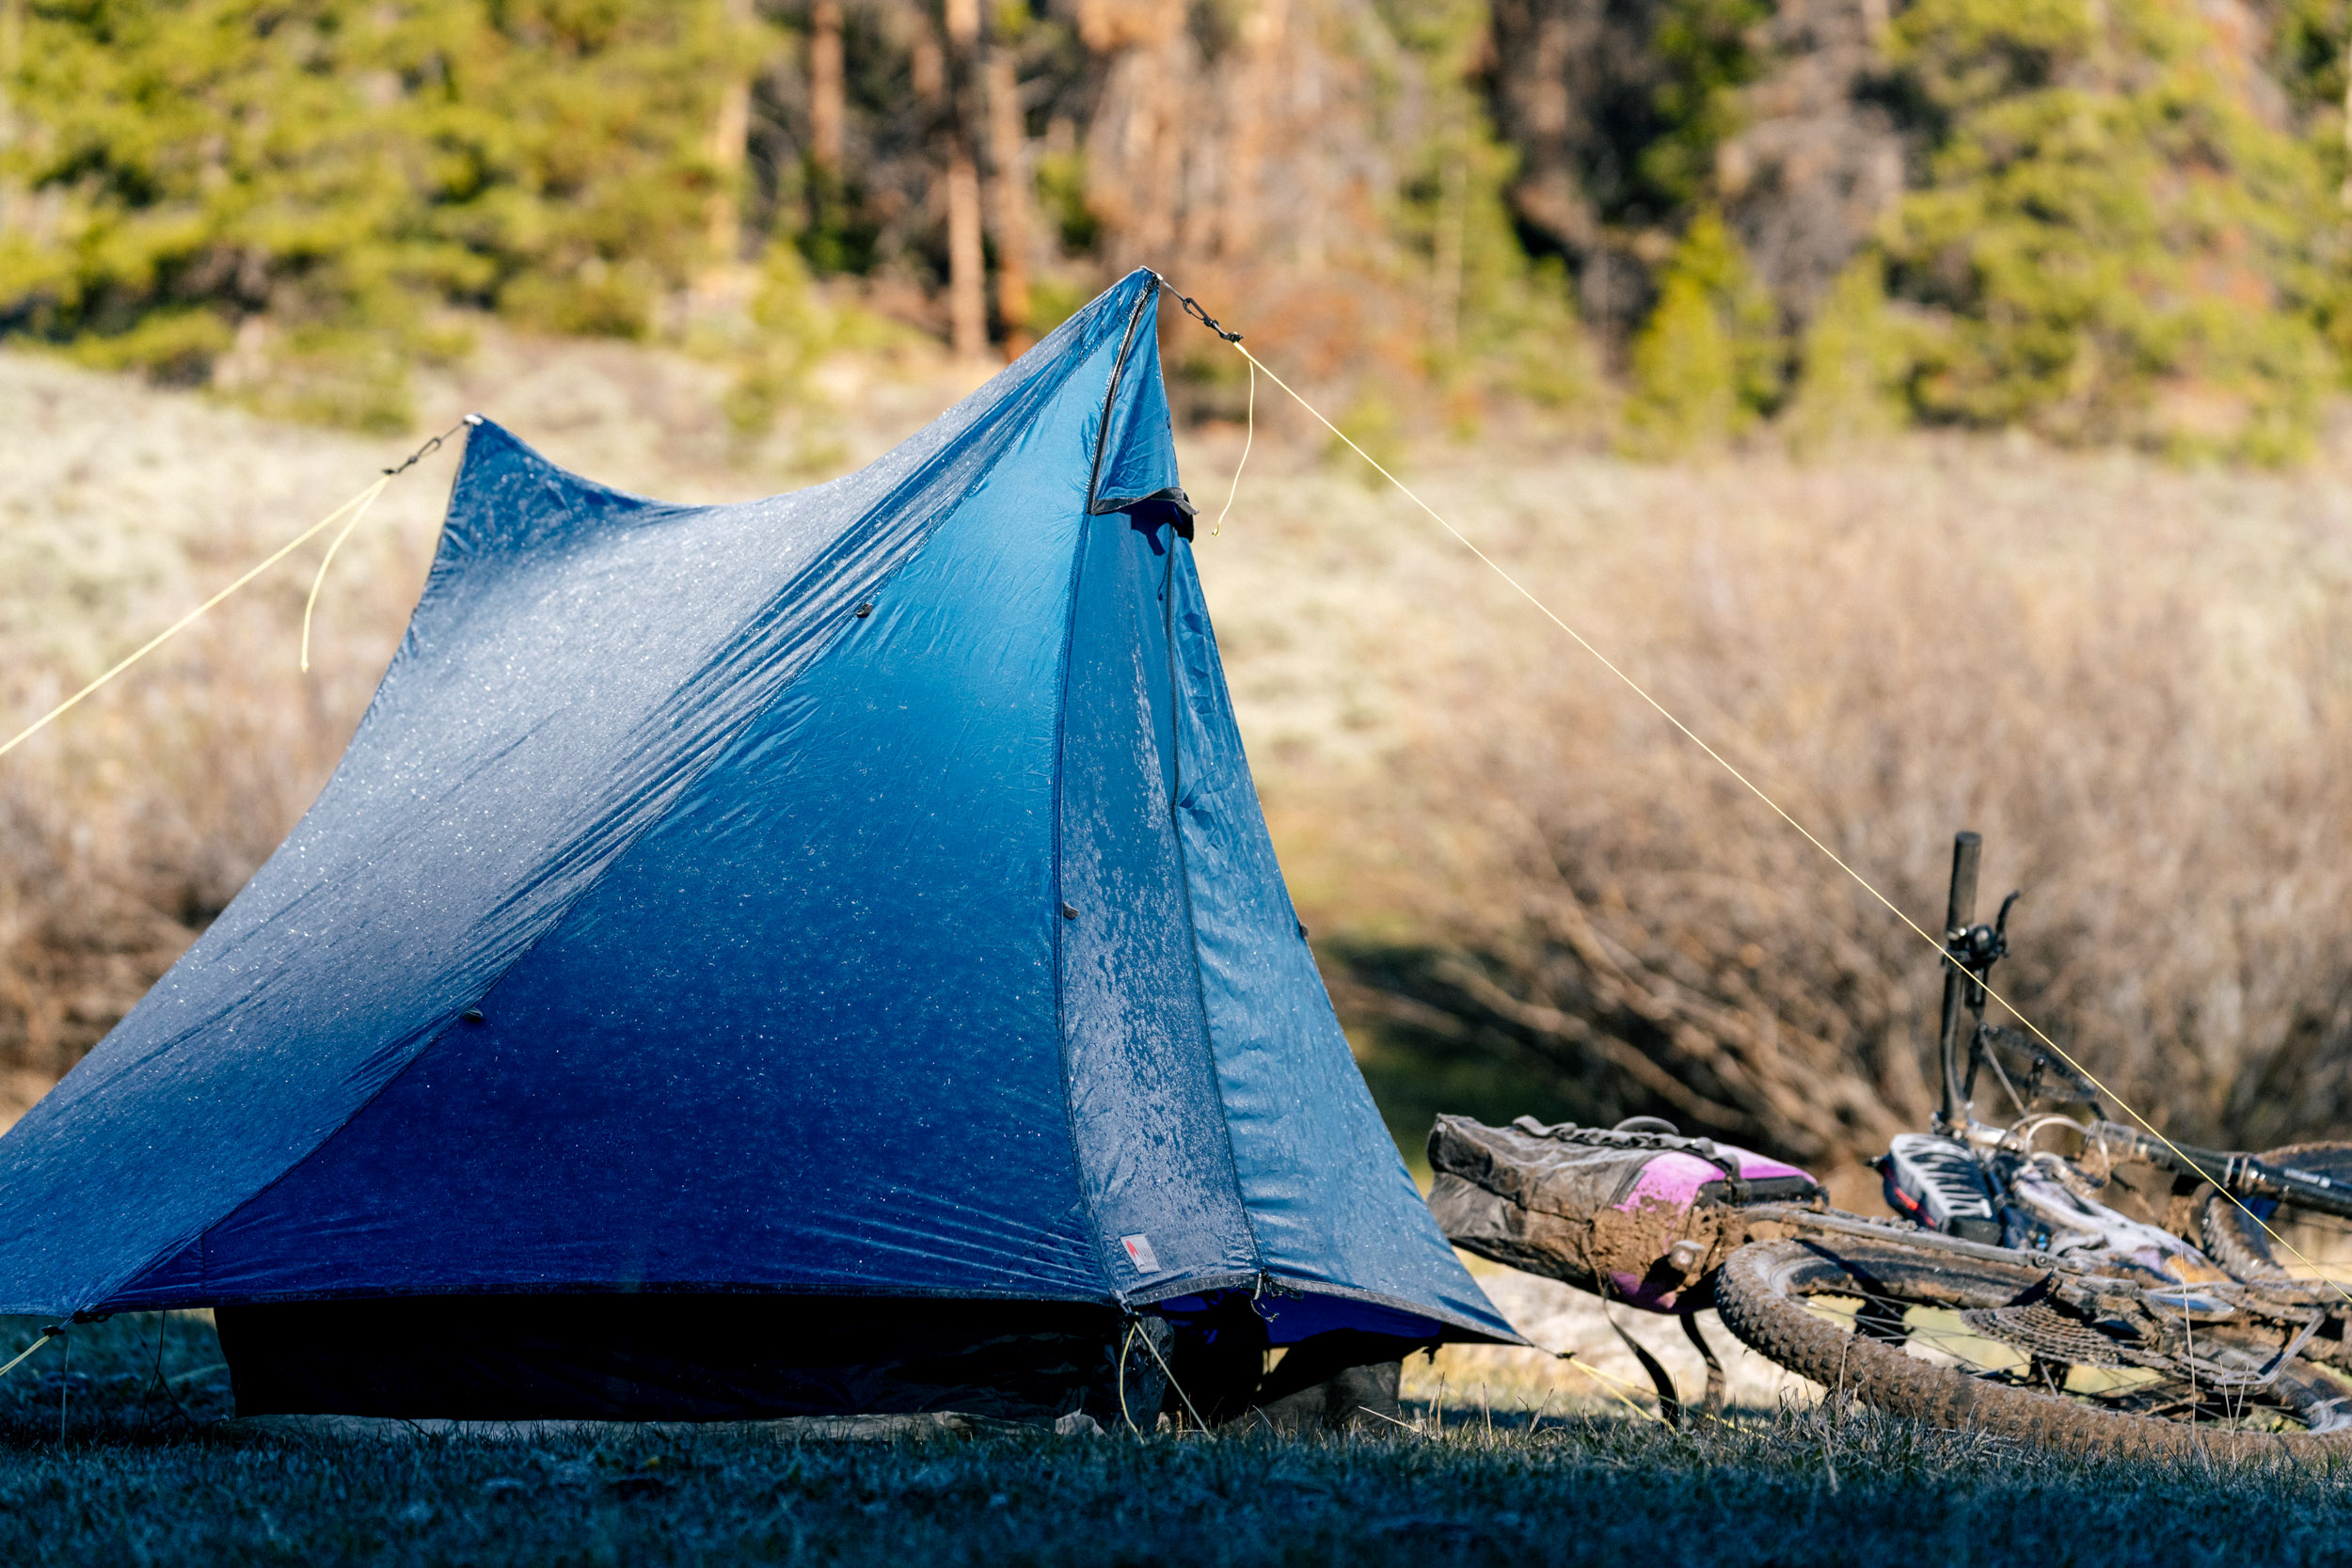
It’s a clever, versatile setup, and I’d encourage you to play around with the various configurations. Another tip: mark the fly’s four main corners. I don’t roll up my shelter carefully; I shove it into a dry bag. Finding the right corners sometimes took me a moment. It would be neat if these were marked in a different color.
Thoughts on the Swiftline’s Design
I used the Swiftline on a variety of trips this summer: cool nights, wet nights, and some very dry, smoky ones on the Colorado Trail. Condensation wasn’t much of an issue with this shelter, which is nice since it’s one of my biggest pet peeves. I live in the Rockies at altitude, where the sun does wonders at drying this out, but even on some cool nights next to a river, with condensation all over the ground in the morning, I was impressed by how dry it stayed inside.
At first glance, the Swiftline might not look very stable. In use, its two offset poles made it one of the steadier shelters I’ve tested. Its main footprint is manageable, but the apex guylines extend farther than you might expect. In a tight campsite, I occasionally had to get creative with where I anchored them. It’s also worth pointing them out to your campmates so nobody trips over one at night.
One advantage I didn’t have to use is taking down the inner while the fly stays pitched. In sustained rain, you could pack your sleep kit, get dressed, move your gear into the vestibule, and unclip the inner before stepping outside. That would let you pack it separately from a wet fly. I usually just opened the shelter in the morning, let it dry, and packed both layers together. I never had to break camp during a major rainstorm, but this flexibility is so nice to have.
I left it pitched through about seven hours of steady rain this fall. I barely had to adjust the tension afterward, and even that wasn’t really necessary: water was still running off the fly properly, beading on the fabric, with no sign of wetting out. The seams stayed sealed and showed no signs of leaking. The roughly 20cm bathtub floor provided a good barrier against splash and wind, and the fly provided solid coverage. The trickiest part in rain is getting through the door without letting water inside. The fly’s angled edge directs runoff away from the opening, but a little moisture can still creep in when you enter. My shelter was seam-sealed, and I’d recommend sealing yours if you expect to spend a lot of time in sustained rain. After that test, I had no concerns about water getting through the fly or its seams.
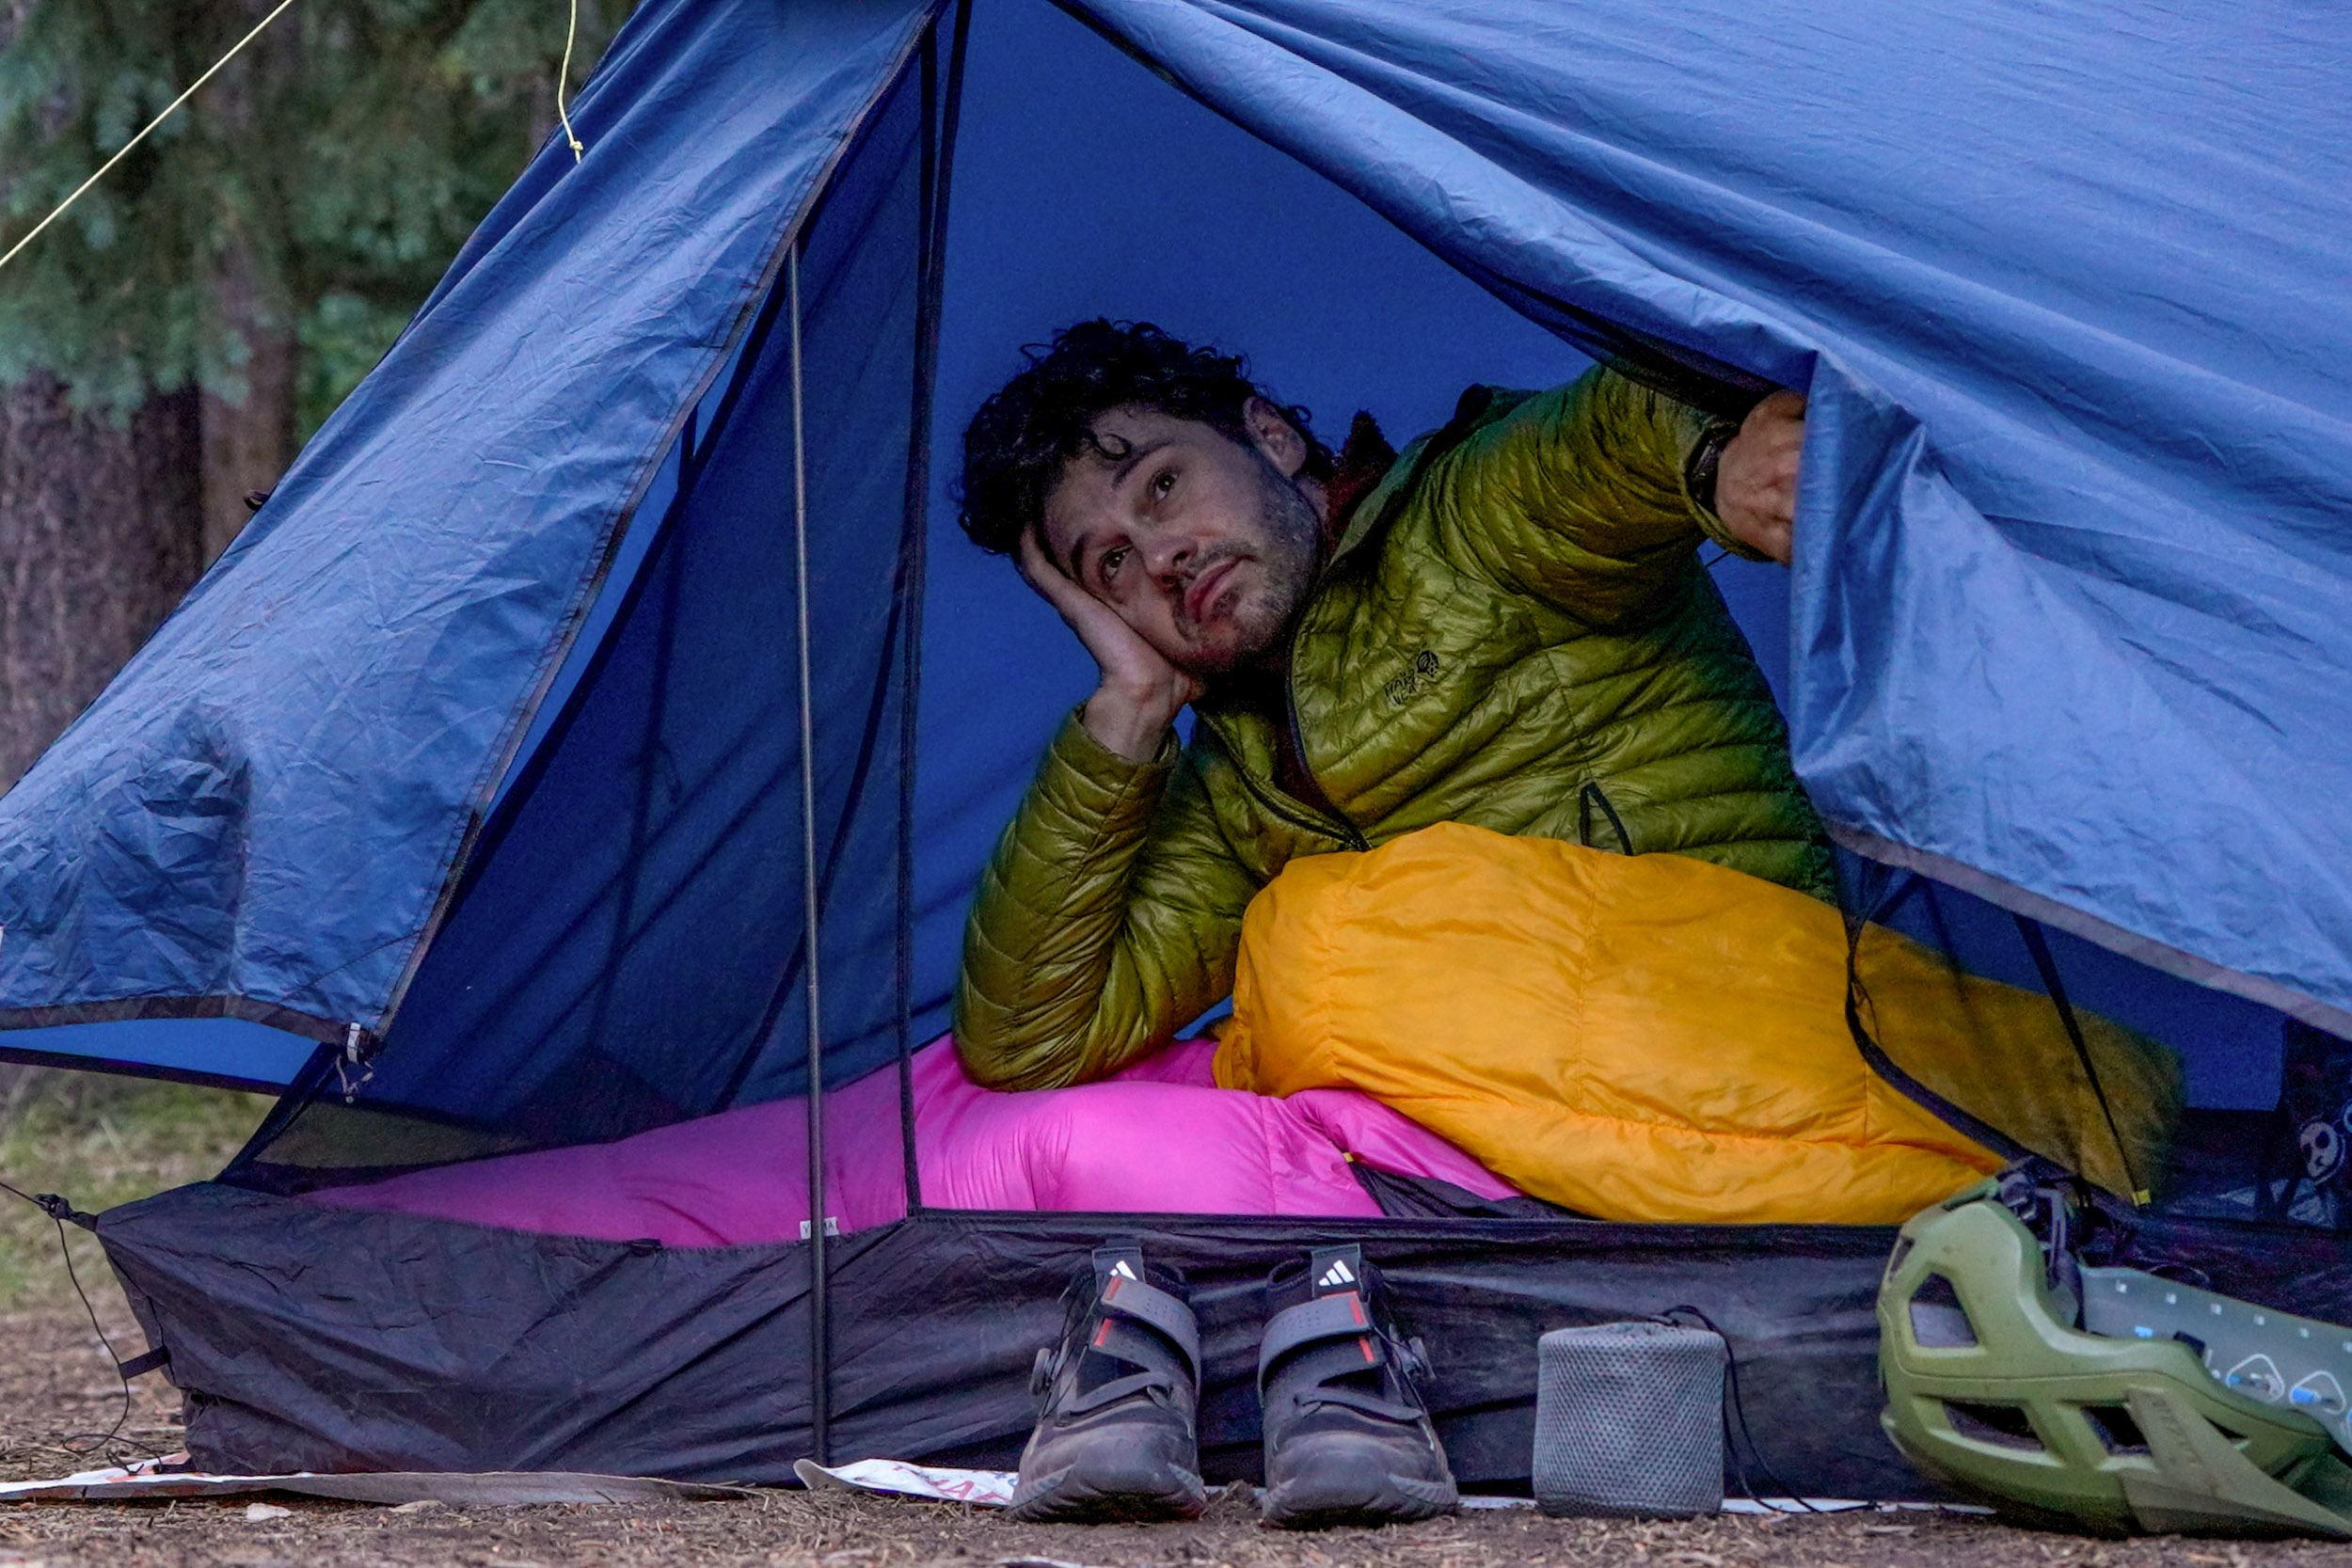
Inside, the Swiftline has plenty of length and overall height, but the sloping walls limit where you can sit upright. I found that I needed to stay near the middle, between the poles, to avoid brushing my head against the mesh. I spent one storm waiting it out inside and was comfortable enough there, and a friend could join too, but your head will inevitably hit the mesh. For context, the Medium Swiftline’s 218cm floor is almost the same length as the straight sleeping area in the X-Dome 1+. It’s a little shorter than the SlingFin Portal 1 and Lunar Orbiter, but its 112cm peak is taller than both the X-Dome and Portal. Those peak numbers only tell part of the story, though. In the Swiftline, the roof slopes down quickly from the center, so where you sit matters.
The interior is simple. The inner door has two zipper pulls that meet near the fly’s door; one pocket sits nearby, and the mesh body has no hanging points. It also has two small vestibules, though only the one by the door is directly accessible from inside. Neither is huge, but together they gave me enough protected space for my shoes, helmet, and a few things I didn’t want next to my sleeping bag. I’d love a small mesh pocket up high for a light, but I wouldn’t want to add much more. I appreciate how simple this shelter is. I’m also glad I chose the standard version. The mesh feels light but has held up well, and the bathtub floor and fly strike a nice balance between weight and durability. The stitching still looks great, and I haven’t found any construction issues. Most of all, I slept well in it, and that’s ultimately what I want from a shelter.
One of its biggest bikepacking strengths is how well it packs down. The shelter takes up very little space on the bike. The longer aluminum poles may not fit in every frame bag, but they’re easy enough to carry alongside a handlebar bag or on a rear rack. I hope Yama finds a shorter pole option, but the current three-section aluminum poles have felt plenty solid in use.
Pricing and Weights comparison
All told, the Swiftline is pretty darn light, thanks to its simple design, lightweight materials, and minimal pole setup. My seam-sealed shelter weighed 898 grams with the 113-gram carbon pole pair I tested, without stuff sacks or stakes. With the 149-gram aluminum pole pair Yama currently sells, it came to 934 grams in that same configuration.
From left to right: Mountain Hardwear Nimbus UL1, Slingfin Portal 1, and Six Moon Designs Lunar Orbiter.
That makes it one of the lightest shelters I’ve used. My Mountain Hardwear Nimbus UL1 weighed 933 grams, while the one-person MSR Hubba Hubba Bikepack came in at 1,066 grams. The Durston X-Dome 1+ weighed 1,098 grams, the SlingFin Portal 1 weighed 1,250 grams, and the Six Moon Designs Lunar Orbiter weighed 1,255 grams. Those setups included different accessories, so the numbers aren’t perfectly equal comparisons, but they show where the Swiftline falls among the solo shelters I’ve tested.
The price is reasonable for a shelter made in the USA. The Medium fly and inner I tested cost $375. Bikepackers will likely need poles, which add $41, bringing it to $416. Yama charges another $60 for seam sealing, or you can do that yourself. My setup came to $475.88, though I tested it with carbon poles that Yama doesn’t currently sell. That’s a little more than some shelters I’ve used, but it’s hard to beat the Swiftline’s weight, especially if you choose the light version.
- Model Tested: Yama Mountain Gear 1P Swiftline Ultralight Tent, Medium
- Actual Weight: 898 grams (31.6 ounces)
- Place of Manufacture: USA
- Price: $375
- Manufacturer’s Details: Yama Mountain Gear
Pros
- Lightweight and packs down small
- Stable in wind and sustained rain
- Fly opens in multiple configurations
- Inner can stay attached for quick setup
- Excellent ventilation with little condensation during testing
- Quality construction, made in the USA
- Multiple sizes and material options
Cons
- Sloping walls limit sitting room
- Long guylines need extra space
- Even tension takes practice
- Aluminum poles pack to 44cm
- Small vestibules and limited storage
- Poles, stakes, and seam sealing cost extra
Wrap Up
After using the Yama Swiftline one-person tent for a while, I’d recommend it to a solo bikepacker who wants a light, compact shelter and doesn’t mind taking a little time to dial in a staked pitch. I like being able to pitch the fly first, leave the inner attached for a quicker setup, and open the fly wide on a nice morning. You’ll need room for the guylines and a separate pole set if you don’t carry trekking poles, but those have been easy trade-offs for me.
Further Reading
Make sure to dig into these related articles for more info...
Please keep the conversation civil, constructive, and inclusive, or your comment will be removed.













 English (US) ·
  French (CA) ·
  French (FR) ·